Sunday, December 20, 2015

Pre-Christmas Presents!

As some readers are aware, my life has been rather complex over the last six months and there has been little time for photography.

However, with the Christmas break now starting, I have managed to find some time to explore three ‘toys’: I mean early Christmas presents.

First, further additions to the growing family of Photoshop Luminosity Masking (LM) tools; second a fantastic new App for Sony shooters; and thirdly an excellent training video, that I’m looking forward to watching over the holidays.

As many know, I currently use two LM toolsets, that I find to be complementary: TKActions and Lumenzia. I also have Raya Pro, although I tend to favour TKActions and Lumenzia. I have now added a fourth LM tool to Photoshop, that I really like, namely ADPpanel+ from Arron Dowling at http://goo.gl/cf5ZTm

I hope to write more about ADPpanel+ in future posts, but for now I’ll simply recommend you review it. At less than $25, it’s worth a punt!

The Sony (in-camera) App I wish to mention, that I just purchased for less than $10, is Sky HDR: https://goo.gl/U2SYYq

Simply put, if you use graduated ND filters to hold back the sky in landscape photography, then this App is for you: and, of course, if you have a Sony camera that can play Sony’s Apps!

The App allows you to position the variable ND transition, vertically and in rotation; allowing you to set the exposure for the foreground and the sky, and adjust the feather of the transition, from hard to soft.

Being able to do this is impressive, but the App has two killer features. The first allows you to adjust the position of the ND after it has captured two images, one for the foreground and one for the sky. The second is that the App processes the two images in camera and saves the resultant image as a RAW: yes a RAW.


https://www.playmemoriescameraapps.com/portal/template/usb/images/MK_USB_App_how_to_image_8_IS9104-NPIA09014_00-000017_Pic8.png
 

Unfortunately this evening’s weather was pretty bad, but I managed the following test image in my garden with my Sony A6000. With a close-in tree element, the composition isn't ideal for a graduated ND, as the graduated effect cuts through the near field tree: but this was only a quick test.

This is the single RAW capture, no highlights were blown out, using the Sky HDR in-camera App. I processed it in LR and applied a little Orton effect in PS.


My third early Christmas present was a video training course, which I’ll review after I’ve watched it. Unlike my usual video purchases, at a round $30-50, this one was $250.

Bottom line: now that I’ve started my Christmas break, and I’m off work for two weeks, I hope to be able to ‘play around’ with some photography, in between eating turkey and drinking some good beers!

Merry Christmas!

Tuesday, December 1, 2015

Further explorations with IR

In previous posts I have talked about infra red photography, which for me means my EOS 50D converted camera. In this post I thought I would talk a little about the post processing.

The starting image is the usual horrible looking RAW capture; and if you looked at this image, you would think that there is no hope.


The first step is to get rid of the colour cast, using a DNG profile I created for use in Lightroom: giving this as my new starting image for post processing.


Following the colour cast correction, I made a round trip to Photoshop-CC and used a couple of tools:
  • SilverEfex Pro II to do the base conversion to B&W; 
  • Use of both TKAction and Lumenzia luminosity masking tools to bring out some localised tonal quality;
  • Use of Flaming Pear Flood to accentuate the reflections in the creek;
  • Finally returning to LR for some tweaks.
Arriving at this final image, taken in Canyon de Chelly and one of the natural arches: which I hope you enjoy.


Simulating Composition and Lighting in Landscape Photography

In previous post I have talked about various Apps that help you simulate or plan for a photography expedition. To day, thanks to a YouTube video by Yuri Fineart, I came across another technique: https://youtu.be/hTg6yo5venU

All you need is to download the free Google Earth App: following which you can get a feel for any location where you are thinking of trekking.

The one ‘disadvantage’ is that you don’t seem to be able to visualise the Moon’s transit across the sky, like you can with the Sun. However, for sunrise, sunset and astro-photography, it's great.

Rather than attempting to explain the tool, simply watch Yuri's video.

Wednesday, November 25, 2015

Enhanced post-processing control

In previous posts I have spoken highly of Tony Kuyper’s TKActions, which now includes infinity mask construction. TKActions is a true engine room for advanced post processing: http://goodlight.us/writing/actionspanel/panel.html

Having experimented with other luminosity masks toolsets, such as Raya-Pro (http://www.shutterevolve.com), I believe I have now found the ‘ultimate’ luminosity masking set up, which is: TKAction and Lumenzia - together!

Lumenzia creates masks in a different way to TKActions, not through channels but through
taylored use of curves. Lumenzia is available from: https://gregbenzphotography.com/lumenzia/

At $70 for the pair, these two Photoshop add-ons represent real post-processing value.

As to how and when I use them? Simply every time I use Photoshop.

Thus, after a few Lightroom corrections my workflow is a round trip to Photoshop and, using both TKActions and Lumenzia, which work seamlessly together, I exploit the tailored adjustments that the self-feathering luminosity mask-based approach allows.

As a simply example of the control that an LM-based workflow brings, the following single image, Sony A6000 capture was given the LM touch., which allowed me to target the trees and bring drama into the sky. Note that the sky was there in the original capture, it 'just' needed developing in post.


Bottom line: if nothing else watch the video tutorials on TKActions and Lumenzia. But I’m sure you will decide that $70 is a real bargain.

Sunday, November 8, 2015

Fireworks!

In all the years we were living in the US I never tried to take images of fireworks on the 4th of July, when the Americans celebrate something or other.

This Saturday was Bonfire Night in the UK, where we Brits celebrate the failure of Guy Fawkes' actions on 5th November 1605 in trying to blow up the House of Lords. Of course some are celebrating a ‘good effort’ :-)


“Remember, remember the fifth of November,

Gunpowder treason and plot.

We see no reason

Why gunpowder treason

Should ever be forgot!


Guy Fawkes, guy, t'was his intent

To blow up king and parliament.

Three score barrels were laid below

To prove old England's overthrow.


By god's mercy he was catch'd

With a darkened lantern and burning match.

So, holler boys, holler boys, Let the bells ring.

Holler boys, holler boys, God save the king.


And what shall we do with him?

Burn him!”

As kids we always made a ‘guy’, that we put on the bonfire on the 5th, and went round the streets asking for a ‘penny for the guy’, so we could have enough money to buy some fireworks. One of my earliest memories, when I was about 10 years old, was meeting my first American, a tourist, who was obviously saddened to see this British kid out on the streets ‘begging’. So, rather than get a penny, tuppence or even a sixpence, as you would from a Brit, he gave me half-a-crown (For US readers that was two shilling & sixpence, the largest British coin in large scale circulation during the pre-decimal era).


So this Saturday we found ourselves with friends and close to a neighbour of theirs Bonfire Fire Party. A chance to finally have a go photographing fireworks: which I found isn’t that hard.

The settings on my 5DIII were F/11, ISO-100 and Bulb mode. Manual focus on my 24-105mm F/4L lens was set using Magic Lantern feedback.

I found it was about timing and simply grabbing a few exposures, all round the 10s mark, ie on a tripod.

Because we were watching a ‘free show’, I wasn’t that well positioned to see the fireworks and my near field interest was rather limited, but I did managed to get a tree in the scene in some captures.


 Bottom line: next year I think I will pay to get the best vantage spot :-)

Monday, October 5, 2015

More ad hoc experiments with the Venus 15mm Wide Angle Macro (WAM)

Although the Venus 15mm WAM has the potential for 1:1 macro, in reality this feature is difficult to realise in reality, as the subject is only a few mm from the front of the lens. Thus the lens needs to be ‘throttled back’ to the sub-macro zone, say, 0.6 to 0.8.

Macro aside, the lens is also a pretty good 15mm wide angle lens, at a macro of around 0.1: where, at an aperture of F/16, the hyperfocal is about 0.8m.

Of course a post from me wouldn’t be complete without mentioning Magic Lantern and an insight into how ML enhances the image capture process.

The scenario below is a typical situation: an indoor capture with mixed lighting. Of course, shooting RAW means the White Balance is not a big issue, and can be ‘recovered’ in post, however, why not try and get is right in camera.

For those that don’t know, ML provides an in-camera custom WB capability, all obtained with a single button push, whilst in LV.

In the following boring internal shot of our sitting room, I used the ML RAW spotmeter, which provides Ev feedback, to set a base exposure centred on the darkest area I wanted to see detail. I then used the ML auto bracketing to ensure I captured the lighlights with the minimum number of brackets: resulting in a three bracket capture at 30s, 8s and 2s.

After ingesting into LR, and before post processing, I took the 2s exposure, created a virtual copy and reduced the virtual exposure copy by 2Ev. This ‘trick’ often helps when enfusing images in, say, LR-Enfuse.

Bottom line: although shooting RAW means that WB settings are not that important, why not get it right in camera and use the magic of ML.


Wednesday, September 23, 2015

Just keep on experimenting

As some know, we recently returned to the UK after some 8 years in the US.

For me, the real downside of our return has been the fact that all my photography equipment was ‘locked away’ in a 40ft container. That all changed a couple of weeks ago, when our US life turned up in the UK.

For those that can’t imagine a 40ft container: think some 400 boxes!

Anyway, now I have all my ‘stuff’, I decided to bring together two of my latest ‘toys’: the new WA macro lens and my new ColorRight Lumenator Pro, a flash diffuser and high output LED system: https://colorright.us/index.php/led-lighting/lumenator-hidden-bundle.html


In my experiment today I only used the LED element to bring some light onto the scene. I set the WA Macro to F/16, used ML to ‘grab’ my exposure at ISO 100, resulting in a 0.4s exposure.


Bottom line: for those who have not spotted the Lumenator Pro’s entry on to the market, I would recommend you give it a look. It seems to offer help to the macro photographer looking to ensure the right light falls on small and dark scenes.

Tuesday, September 22, 2015

Further experiments in Wide Angle Macro Photography

Just a few words on my continuing (indoor) experiments with the new WA macro lens.

The set up was a simple still life in the kitchen. I set the focus on one pencil and applied a little shift on the lens, to correct for my tripod-pencil geometry. I kept the aperture deliberately open, at F/5.6, to see what the bokeh looked like.

Exposure setting was aided by Magic Lantern, via its auto bracketing, giving me three brackets at 1, 1/4 and 1/15 of a second, all at ISO 100.

I then brought these into Lightroom and used Lr-Enfuse to blend the three images together. I also did a white balance correction and some sharpening in LR, and then exported the image to Photoshop-CC.

In PS-CC I used the select Focus Area tool to create a mask, that I used to bring a little extra ‘focus’ to the pencil tip using a curve layer.

Here are two images that show off the new lens: the first an uncropped image showing the WA ‘reach’ of the lens; the second a cropped image showing the macro capture capability.


Sunday, September 20, 2015

A new perspective

I would wager a pint of beer, IPA of course, that anyone reading this post with a dedicated macro lens, ie with a magnification of unity, will be shooting at 50mm or more, and many will have a lens at 100mm. As an example I have the Canon 100mm F/2.8L.

The depth of field at unity magnification is, of course, small, ie hovering around a mm on my full frame 5D3, according to the aperture, but independent of the focal length.

From a composition perspective macro lenses can be limiting as, for example, at a focal length of 100mm the diagonal field of view is just under 25 degrees.

Well now the FoV restrictions have been lifted, thanks to Anhui ChangGeng Optical Technology Company Limited (Venus Optics), a Chinese camera lens manufacturer based in Hefei, Anhui. Their first lens was a 60mm macro with a magnification of 2.

Their second lens, and the one I got in the post today, is a wide angle (15mm) F/4 macro: http://www.venuslens.net/product/laowa-15mm-f4-wide-angle-1x-macro-lens/

At 15mm the diagonal field of view is now pushed out some 110 degrees: thus offering us the chance to take macros and show the environment of the subject.

Another feature that this lens has is a shift of +/- 6mm, which I used in the test image, taken at an aperture of F/5.6.

In this post all I wanted to do was to alert you to the lens and illustrate the wide angle capability with this terrible capture made in front of my TV, with a cloth flower as my subject.


In future post I hope to explore this new lens in the real world!

Tuesday, September 8, 2015

Filters aren’t just for your lenses

Unlike in the film days, with digital we are ‘protected’ from the non-visible parts of the spectrum, ie the infra-red end and the ultra-violet ends. Most DSLRs have various ‘filters’ in front of the sensor, eg to block IR.

Some argue that UV filters are still of value, but as a lens protector, ie better to break a ‘cheap’ filter than the front of an expensive lens.

Of course, some lens filters are still needed, for instance it is difficult to ‘correct’ for glare in Photoshop, so sometimes a circular polarisers comes in useful. In addition, we all need ND filters to achieve LE shots.

But this post is not about lens filters. It is about the use of filters in another part of our photography system: over our eyes!

As some know, last year was not a good year for me: as I had three eye operations. Two for macular puckering and one for cataracts.

The first thing I noticed was that the eye I had the operation on had a WB shift towards the blue, ie my ‘good’ eye looks warmer relative to my ‘fixed’ eye. I have been told this is usual even in people with two ‘good’ eyes, ie the brain creates a composite WB.

It is easy to test your own eyes. Simply look at a light source by alternately closing each eye and seeing if your perception of the scene’s WB changes.

Although our post processing pivots around WB, in the field, shooting in RAW, WB is not that important.

What is important, however, is simply being able to read the camera and see the scene.

So most of us will automatically turn to our sexy sunglasses. But, bluntly, looking sexy is not that important to me: what is important is capturing my image.

Having experimented with various sunglasses, both prescription and non-prescription, I have finally settled on High Density copper, non-polarised, blue-blocking sunglasses.

The reasons are simple: I found polarised negatively impacted my ability to read my camera’s LV scene. I found glasses that were too dark also made it difficult to read the camera. I also found a full UV blocker made every thing clearer, ie blocking UVA, UVB and UVC.


So, in the end, I went for a rather ‘cheap’ solution from Ideal Eyewear (http://goo.gl/4nvpgr) that fit over my prescription glasses.


At $18 (in the US) these glasses are cheap enough, that if I lose them or break them, I don’t care. I can, however, now can see the scene in a quasi-HDR way, eg clouds pop.

Bottom line: I recommend you try out this type of sunglasses, and let me know how you get on.

Sunday, August 23, 2015

Turning down the Tone

Like many photographers I jumped on the ‘HDR band wagon’ a couple of years ago. Since those early tone mapping days, which tended to end up in rather ‘over processed’ images, the algorithms have matured and, today, one can use most tone-mapping software with confidence.

In addition, fusion-based blending is now readily available and offers a ‘softer’ approach to bringing together bracketed captures.

The ‘third-way’ to handle bracketed images is by ‘hand blending’ via, for example, luminosity masks in, say, Photoshop.

As I have mentioned before, TK-Actions are, in my humbly opinion, some of the best luminosity tools. However, TK-Actions are not the only tool. Another set of actions I use is called Raya-Pro by Jimmy McIntyre: http://www.shutterevolve.com/raya-pro-the-ultimate-digital-blending-workflow-panel-for-photoshop/

The British summer showed itself at its best today: great skies and summer scenery. Because of the sun shinning through the clouds, the scene was beyond a single capture, even with my 5DIII.

This image was captured with Magic Lantern auto-bracketing. I focused in Liveview, using the ML diffraction corrected DoF display, and used the RAW spotmeter to establish the base image. In post I used Raya-Pro to blend the brackets, ie no tone mapping this time.


If you have not tried Raya-Pro, I can recommend this very affordable Photoshop Plug-in.

Saturday, August 22, 2015

Hidden Detail

Sometimes full detail in an image can be a distraction: overpowering the eyes and not allowing the viewer to naturally find their way through the scene.

Then again, sometimes, detail has a impact of its own.

I’m still experimenting with infra-red photography, but one early conclusion is that there is a lot of detail that can be extracted. As with colour digital images, but I believe more so with IR, post processing is essential and critical.

Here is a RAW IR of a trip I did to Utah in 2014. I was attracted to this dead tree as I thought its bark would result in a distinctive contrast differentiation against the sky. However, I didn’t want a simple silhouette, with the bark ‘blocked up’.


Processing was pretty straight forward: starting in Lightroom with a colour cast correction, based on a profile I created in Adobe DNG Profiler. I next carried a basic tonal adjustment and applied a little dehaze adjust, which I find works well with IR images.

I also used Piccure+ to mazimise the ‘sharpness’ and address some noise. B&W creation on this occasion was limited to LR, rather than Silver Efex Pro II. I finally applied a little edge burning to create a separation for the image. I tried black, but preferred white on this occasion.


For those that have yet to experiment with IR, I think you will be surprised at the detail you can extract. From my experience, visible and IR sunlight present radically different photographic challenges.

Sunday, August 16, 2015

An Evening with Will

“Well, God give them wisdom that have it; and those that are fools, let them use their talents.”

― William Shakespeare, Twelfth Night

In the last post I talked about our local National Trust property: The Vyne. On the day I last visited it never stopped raining: so I was a little apprehensive this Saturday as we had tickets for the outdoor production of Twelfth Night at The Vyne: put on by the (modern) Lord Chamberlain Men. William Shakespeare worked as actor and playwright for nearly a third of his career for the original company.

The Lord Chamberlain’s Men’s web site (http://www.tlcm.co.uk) says the original all male company was formed at the end of a period of flux in the theatrical world of London, it had become, by 1603, one of the two leading companies of the city and was subsequently patronized by James I and renamed The King’s Men.

The company was founded during the reign of Queen Elizabeth in 1594, under the patronage of Henry Carey, 1st Baron Hunsdon, the then Lord Chamberlain, who was in charge of court entertainments. After its patron's death in 1596, the company came under the patronage of his son, George Carey, 2nd Baron Hunsdon, for whom it was briefly known as Lord Hunsdon's Men until he in turn became Lord Chamberlain in 1597, whereupon it reverted to its previous name.

For most of its life, the company was one of the most prominent of its day, favoured by commoners and aristocracy alike – indeed The Lord Chamberlain’s Men was often invited to perform at Court, and records show that Queen Elizabeth I preferred them above all other companies. Such was the enthusiasm of the next monarch, James I, he even agreed to grant the company Royal Patronage.

The original company began life at a playhouse called The Theatre, northeast of the City of London. The owner of that land, however, had become firmly opposed to letting plays continue at The Theatre, and thus the company entered the late 1590s without a regular playhouse, though records indicate that they performed at the Curtain Theatre in Shoreditch while planning a permanent home. This situation changed when the company leased land in Southwark and, taking the framing timbers from The Theatre, constructed the now world-renowned Globe Theatre.

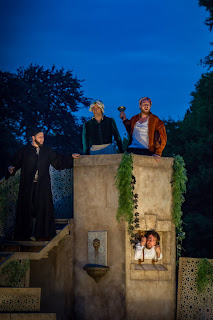
Luckily the rain held off and we were rewarded with a great production and a great sunset. Although I limited my photography, for obvious reasons, it was an opportunity to snatch a few shots of the actual performance, using my Sony 6000, without flash :-)

This first image is a handheld , three image, pano, taken at 18mm, f/6.3 and 1/100s. Processing was initiated in Lightroom, and I used the LR new pano feature. I have more to do in post to correct the 'pano distortion'.


Although this next image can hardly be could ‘sharp’, as a record of the evening I am happy with it, as it was taken handheld at 200mm, 1/200s, f/6.3 and ISO 3200.


And of course you must have a shot of Malvolio in prison.


Finally, in addition to the play, we were rewarded by a lovely sunset.


Overall I remain impressed with the Sony A6000. It has good low light capability and a ‘low profile’, that doesn’t shout ‘professional camera’, so it can pass scrutiny in certain venues that would not look kindly on a ‘larger’ DSLR.

Tuesday, August 11, 2015

Sometimes detail and colour matters

In a previous post I talked about The Vyne, near Basingstoke. The beauty of The Vyne, and in fact any other National Trust property, is the chance to photograph detail.

Sometimes in an image you wish to differentiate between elements of an image by using selective focus; other times you want things tack sharp throughout the image. For instance, classically, one seeks out great depth of fields in landscapes, but ‘indoor landscapes’ can also be a challenge; especially when hand holding in a dark and old house like The Vyne.

The following is a RAW, hand-held image from my recent Vyne trip. The image was captured with my 24-105mm F/4L at 24mm and at 1/30s, F/5, using Magic Lantern at a dual ISO with a base 3200, ie not the ideal dual-ISO setting.


As for processing: I started, as usual, in Lightroom, by converting the dual-ISO to a 16-bit TIFF. This TIFF was then adjusted in LR for basic exposure balance and exported to Photoshop. In PS I corrected for WB using a neat little trick that I’ll talk about in a future post. I then used Piccure+ and ACLE to give the image a detail ‘punch’, because I simply wanted to ‘show off’ the detail in The Vyne’s ceiling.

As usual, I would welcome feedback on whether this level of detail is ‘justified’.


Monday, August 3, 2015

Going Square

As all photographers know, compositional ‘theory’ is one thing we need to be very aware of. However, with so many so-called ‘rules’, one question is what fits best with what scene?

As a photographer who is still learning, I admit to finding composition the most difficult aspect of photography. My eye/brain simply doesn’t yet ‘see’ the final image format: so my approach is to capture the scene with enough ‘space’ so that I can simply experiment with different ‘looks’, which is very easy in LR/PS.

Cropping is my friend at the moment, but this means I ‘waste’ data: which I don’t like doing. I need to get ‘better’ at compositional theory.

As an example, take this recent dual-ISO image, which will look weird as a jpg as it is unprocessed, ie being an interlaced mixture of two images: an ISO 400 and ISO 800 image.

My thinking, when looking at the image in LR, was to eliminate the ‘dead’ foreground, which automatically led me to think square.

As I looked into the square format, I found out that the square format camera was first made by Rollei in 1929. Also, Hasselblad, used the square format in its film cameras from 1948 to 2002. I don’t believe there are any digital cameras that have a square sensor. But, as we know, digital photography makes it easy to crop your images to any aspect ratio you want.

So what does the above dual-ISO RAW look like in a square format: well I will let you decide.


Friday, July 31, 2015

The National Trust: now photography friendly

After some eight years living in the US, returning to the UK is like learning about a new country: things have changed. Some for the better, some for the worse.

One of the things that has really gone down hill is the size differential between a car and a car parking space! You now need skill and nerves of steel to park a car in, say, a supermarket car park!

On the other hand, one of the things that has got better is the National Trust’s attitude to photographers. You can now freely use a camera inside their houses: obviously without a flash and a tripod, but that is what modern high-ISO cameras are for.

Last weekend’s NT trip was to The Vyne near Basingstoke: https://www.google.co.uk/maps/place/The+Vyne/@51.313783,-1.08401,17z/data=!3m1!4b1!4m2!3m1!1s0x4874205421f7d14d:0x6e87664e4cfc464c

In addition to photography, it was a chance to renew our NT family membership; as well as using the NT’s iOS App: which is a great tool for photographers, as it helps prepare you for all the wonderful opportunities that the NT presents in each area of the UK: http://www.nationaltrust.org.uk/vyne/

Wiki tells us that The Vyne is a 16th-century country house outside Sherborne St John, Basingstoke, Hampshire, and was built for Lord Sandys, King Henry VIII's Lord Chamberlain.

The house retains its Tudor chapel, with stained glass. The classical portico on the north front was added in 1654 by Inigo Jones's pupil John Webb. In the mid-eighteenth century The Vyne belonged to Horace Walpole's close friend John Chaloner Chute, who designed the Palladian staircase, whose magnificent apparent scale belies its actual small size.

The Vyne was bequeathed by its final Chute owner, Sir Charles Chute, to the National Trust in 1958.

The grounds contain large woodland and a wetlands nesting site which is populated by swans and common redshanks. There are a number of woodland, wetland and parkland walking trails. Unfortunately, on this occasion, the weather was against us and we had to restrict ourselves to inside the house.

From a photography perspective I was interested in seeing how my 5D3 handled the dim interiors, albeit ‘boosted’ by Magic Lantern’s Dual-ISO feature, which gives nearly a 3Ev ‘lift’ to the dynamic range potential of a single 5D3 image, ie non-bracketed.

I must say, overall, I was pleased with the results and here are a few examples of non-flash, Dual-ISO captures from The Vyne.


Saturday, July 25, 2015

A selfish post

As some know we have just returned to the UK after some seven years in the US.

From a photography perspective, after a week or so, the biggest difference between our last US location, Cedar Crest in NM, and here in Hampshire, is the colour green!!!

Wiki tells us that “Bryce Bayer's patent (U.S. Patent No. 3,971,065) in 1976 called the green photosensors luminance-sensitive elements and the red and blue ones chrominance-sensitive elements. He used twice as many green elements as red or blue to mimic the physiology of the human eye.

The luminance perception of the human retina uses M and L cone cells combined, during daylight vision, which are most sensitive to green light. These elements are referred to as sensor elements, sensels, pixel sensors, or simply pixels; sample values sensed by them, after interpolation, become image pixels.”

It will be some months before I can get my photography ‘up and running’, as our US home is slowly finding its way to us via a 40ft container!

What has arrived so far is us and our US cat Polly: a polydactyl cat with a congenital physical anomaly called polydactyly (or polydactylism, also known as hyperdactyly), that caused Polly to be born with more than the usual number of toes on one or more of its paws. Polly has six toes on each foot and appears to have an opposing thumb.


Today I also took delivery, via air freight, of my trusty 5D MkIII, so tonight I simply went into the garden, sorry yard, and took a quick snap of ‘our (old) house’.


Our life has changed in moving to the UK: it will be interesting to see if my photography changes as well!

Thursday, July 23, 2015

Further Advances in Luminosity Masking


In past posts I have spoken about the luminosity masking (LM) tools created by Tony Kuyper.

Tony’s latests effort, version 4, is, in my humble opinion, simply, the best and most powerful LM-based tool you can get.

As usual there is little value in me repeating what you can read on Tony’s site: so I’ll simply point you to his web site: http://www.goodlight.us/writing/actionspanelv4/panelv4.html

Bottom line: if you haven’t explored luminosity masking, then I recommend you have a look at the latest version of Tony’s Photoshop panel. If you already use luminosity masks, then you should also look at what Tony’s latest panel can do for your workflow.

These two images, the Magic Lantern Dual-ISO and Auto-ETTR image RAW and the final image, processed with the help of TK-Action V4, give you a feel of what is possible.


Tuesday, July 7, 2015

A Simple Farewell

After nearly 8 years living in the US, I send this simple post from LAX as I leave friends and colleagues. 


Monday, July 6, 2015

Further explorations in Infra-Red

As infra red photographers know, post processing takes a little bit of thought.

First, the captures are rather flat and second they will also have a strong colour cast.

In previous posts I have spoken about colour processing of infra-red and the power of using Lab mode. In this short post I’m revisiting some of my IR shots from my recent trip to Canyon de Chelly, which is owned by the Navajo Tribal Trust of the Navajo Nation.

All my IR captures are with a converted 50D and, of course, I use Magic Lantern. This base capture is 12mm, ISO 100, F/8 and 1/80s. ML ensured it was an ETTR capture.


The post processing starts by correcting for the lens in LR and using an IR profile to remove the red cast.

I then used piccure+ to maximise the ‘sharpness’ of the image, ie virtually ‘boosting’ the lens to an L lens. BTW piccure+ works best at the start of post processing, ie before you start to push data around.

I then exported to PS-CC-2015 and used the new dehaze feature, to recover some of the detail. It was then a simple round trip to Silver Efex Pro II, before I enhanced the image with Flaming Pear Flood.


Although it is ‘fun’ to create colour images from IR, the real power of IR photography is as a starting point for B&W processing.