Wednesday, December 24, 2014

First Real World Long Exposure Experiment with the ND Throttle

One of the advantages of buying an APS-C mirrorless camera is the ability to use all your EOS Canon glass, So, over Christmas, as we are staying near Sidmouth in Devon, I have a great opportunity to experiment along the UK’s Jurassic Coast.

Wiki tells us Sidmouth appeared in the Domesday Book as Sedemuda. Like many such settlements, it was originally a fishing village. Although attempts have been made to construct a harbour, none has succeeded. A lack of shelter in the bay prevented growth as a port.

Sidmouth remained a village until the fashion for coastal resorts grew in the Georgian and Victorian periods of the 18th and 19th centuries. The numerous fine Georgian and Regency villas and mansions are now mostly hotels.

For scene-setting here are a few snaps of Sidmouth taken today, on Christmas Eve:


This was my first outing with the ND Throttle and I decided to use my EOS mount Rokinon 14mm F/2.8 with the Sony A6000.

As I covered the ND Throttle workflow in a previous post, I wont repeat it here.

So here is my first, real world, ND image captured with the A6000, at ISO 100, 25 seconds and F/8 (at about 1300 local time, ie mid day). Finished off in LR with a bit of cross processing.


It is also worth pointing out the other images above were also captured with the ND Throttle attached, but ‘wide open’, ie you only ‘lose’ about a stop of light, which in the day time is not an issue.

Bottom line: based on today’s simple experiment, I believe the ND Throttle, attached to the A6000 and my Rokinon 14mm F/2.8 is a great success.

Sunday, December 14, 2014

Just because I (now) can!

Snow hit us today and I had an excuse to carry on with my indoor A6000 experiments. So I wondered how the A6000 would cope with my Canon 24mm TS-E lens?

The set-up looks like this:


All shift combinations seemed possible, however, due to the close proximity of the adapter tripod foot to the TS-E, adjusting some of the TS-E knobs was tight at times.

I decided to take a full sweep shift sequence, with redundancy. That is a +/- 12mm shift at each of the 9 rotation positions. That is a 27 image capture.

One problem I did face, and didn’t have the time to correct, was that I nudged the TS-E focus ring through the sequence, ie because of the shift knob’s proximity to the adapter. The learning point here is that one needs to be really careful when shifting and rotating the TS-E lens.


The result is that this particular stitched image shows a few ‘soft areas’.

I threw the 27 images at Autopano Giga and rendered the resultant pano as a TIFF, that is a massive 12318x10181, 645 Mb TIFF! Here’s a JPEG of the TIFF, showing the image space created by using the TS-E.


Using the 24mm TS-E on the 1.5 crop A6000 sensor results in an apparent image taken at a focal length of 11.9mm.

Bottom line: There doesn’t seem to be anything I can’t do with the A6000!

Saturday, December 13, 2014

Could this be the final Pano processing solution?


Over the past few years I have experimented with many pano stitching solutions: Photoshop; PTGui; and Microsoft ICE etc etc. All work well and all have ‘weaknesses’ or quirks.
 
Let’s be clear up front: all the above work ‘perfectly’ if you mount your camera-lens system’s entrance pupil correctly relative to the ‘point of rotation’, either in a planar arrangement or in 3D space. Hence, if I have time, and wish to carry it with me to a photo shot, I will use my Fotomate Pano Kit.


But what if I wish to shoot a pano and I don’t have my Fotomate kit with me? How successful can you be get with hand held panos; and how effective are the various pano stitching programs when confronted with a handheld capture sequence?

After some experiments I have now settled on Kolor’s AutoPano as my preferred tool; and in particular AutoPano Giga: http://www.kolor.com/image-stitching-software-autopano-giga.html
 
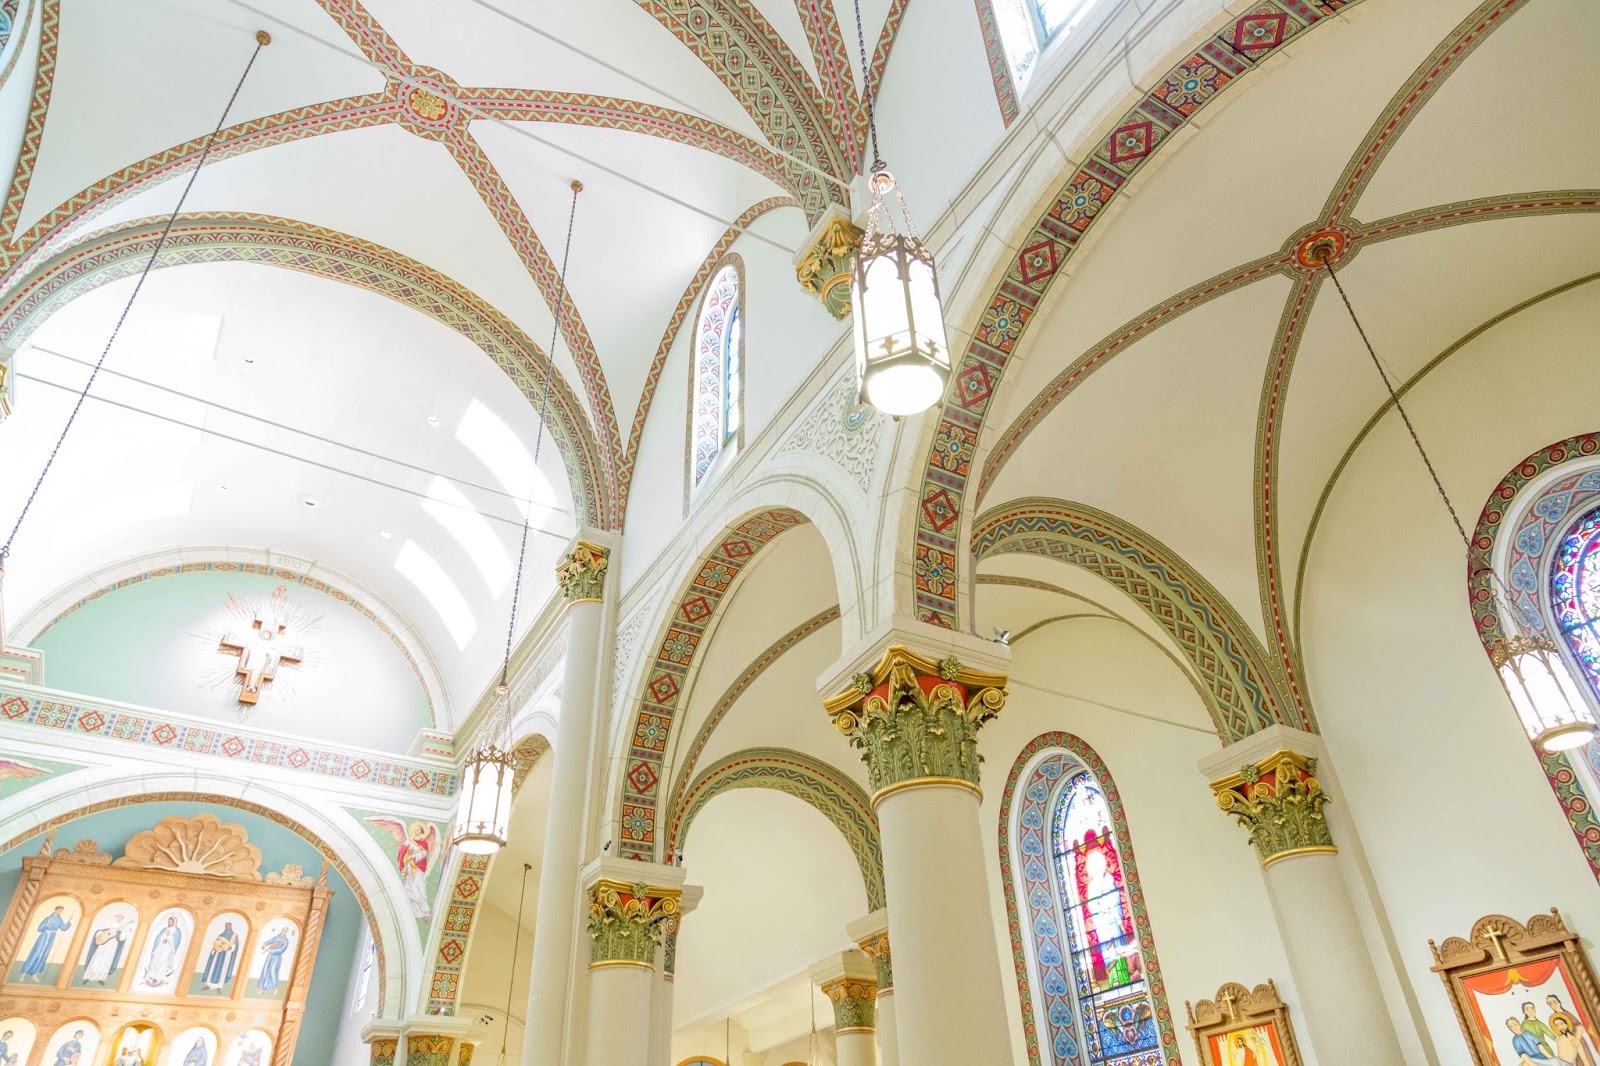
As an example, I threw a hand held sequence (taken with a 24mm lens at F/4 and ISO 6400) of the inside of the Roman Catholic cathedral in downtown Santa Fe: the Cathedral Basilica of Saint Francis of Assisi, commonly known as Saint Francis Cathedral.

Wiki tells us that the cathedral was built by Archbishop Jean Baptiste Lamy between 1869 and 1886 on the site of an older adobe church, La Parroquia (built in 1714–1717). An older church on the same site, built in 1626, was destroyed in the 1680 Pueblo Revolt. The new cathedral was built around La Parroquia, which was dismantled once the new construction was complete. A small chapel on the north side of the cathedral was kept from the old church.

The ‘input’ images had large amounts of image-to-image geometric changes and there were people moving around between the individual captures. 


So how did Autopano Giga do? Well you decide from this image that was created in Autopano Giga simply using its default mapping algorithms.


Obviously, I will be putting Autopano Giga to more tests over the coming months. But, from what I have seen so-far, I’m very impressed with its ability to cope with handheld panos.

Thursday, December 11, 2014

ND Throttle Testing with the A6000

It has been just over a week since I acquired the Sony A6000 ‘system’. The camera is clearly a major departure from my normal gear, eg full frame vs cropped, SLR vs mirrorless, and large vs small! 

I’m stuck at home for a day or so to ‘recover’ from a molar extraction. So a chance to carry out some A6000 experiments.

One reason I was attracted to a mirrorless system, of any kind, was the chance to play around with a variable ND filter (2-1000) that works with a wide angle lens.I have ND filters for my 5DIII lenses, but not a variable ND, as these tend to fall over with wide angle lenses; giving you that horrible X effect in your image: which you can not take out in post. The Vizelex ND Throttle Lens Mount Adapter from Fotodiox Pro allows me to connect my EOS lenses to the Sony A6000 APS-C camera.


Having experimented with the set up today, I have settled on the following workflow (designed for long-exposure photography, ie the ND Throttle is also useful for ensuring a 180 degree shutter speed in videography) for the A6000 with my manual aperture Rokinon 14mm F/2.8:
  • First, ensure the Rokinon 14mm is set to the optimum hyperfocal distance, which, for a blur spot of 18 microns, accounting for the sensor and diffraction on the A6000 APS-C, is just under 6 feet at F/8: using TrueDOF-Pro. In other words, focus at 6 feet and your image will fall within your acceptable focus criteria from about 3 feet to infinity. 
  • Dial in the F/8 aperture on the lens (you will see F/00 in Lightroom as the lens is not electronically coupled to the camera: this missing EXIF data can be added back in later if required). 
  • Focus at 6 feet using the A6000 magnified LV focus screen and focus peaking. 
  • Compose.
  • Set the camera to manual mode and set the desired shutter speed (in this experiment I set the shutter to 15 seconds). 
  • Using LV with the histogram showing rotate the Throttle’s adjustment ring until the LV exposure looks OK, ie ETTR from the histogram and the ‘blinkies’. 
  • Trigger the shutter: I prefer to do this remotely and on this occasion did so through a cheap IR remote. 
  • In Lightroom correct the Rokinon 14mm’s barrel distortion: I use PTLens. 
  • Adjust for look, which in this occasion I didn’t bother doing. 
Here is the resultant 15s test image, ie the usual boring image of one of the rooms in our house.


Bottom line: if you wish to take long exposure images and use a wide angle lens, you really need to carry a set of ND filters with you, as variable ND filters, at the extreme setting, do not work very well (the dreaded X effect). By using DSLR lenses, in my case EOS EF lenses, on a mirrorless body, you are able to make use of the variable ND Throttle, which generates no X effect at wide angles.


Monday, December 1, 2014

Christmas comes early this year


Having converted my 50D to IR, I find myself with a ‘gap’ in my photography bag. That is between the ‘heavyweight’ 5DIII and the ‘flyweight’ S95. That is (5D vs S95) 23.38 Mpix vs 10.42 Mpix; 24 x 36 mm vs 5.7 x 7.6 mm; 6.1 micron pixel pitch vs 2 microns; focal point multiplier of 1 vs 4.50; etc etc etc.
 
I have been toying with the idea of a mirrorless 4/3 camera system for some time; and, of late, my attention has been drawn to one player: Sony. 

Sony seems, to me at least, to be more innovative (and affordable) than others in the mirrorless world, for example their new full-frame Alpha 7 Mk II, with a 5 axis stabilisation system built into the sensor!

So, after many hours trying to carry out a compare and contrast analysis, I decided to opt for the highly customisable, APS-C (crop 1.5) Sony A6000…and it arrived today!


Initially, to get me up and running in the mirrorless world, I went for the 16-50mm kit lens (shown above), augmented with the Sony 18-200mm lens. I threw in a couple of extra (Chinese) batteries, as the A6000 battery life is not considered brilliant, as well as a couple of lens adapters. 

One adapter (the Vizelex ND Throttle Lens Mount Adapter from Fotodiox Pro) to give me as rear mounted ND 2-10 ND capability, but limited/no lens control, and a Signstek adapter that ‘should’ allow the A6000 to communicate with my Canon lenses!


That’s it for now: no more time to blog, only time to play! In future posts I will explain why I went for the A6000; why I think 'augmenting' my Canon inventory is a sound decision; and, of course, some feedback on my new 'toy'...sorry tool !

Thursday, November 27, 2014

BIFing


Last weekend I was fortunate enough to attend a workshop on Birds in Flight (BIF) at Bosque del Apache (BDA) in New Mexico: which is less than two hours from where I live.

There were about a dozen of us in the group led by three very talented instructors. This was my first ‘photo course’ and was it was hard work! 

Each day started with the alarm going off at about 0515, so we could get to the birds before they took off from their evening roost, which at BDA means Sandhill Cranes roosting on ponds.

The mornings were cold with temperatures hovering around 20F on one morning: I soon learned the value of toe and finger warmers I had taken with me!

The day consisted of class time, daylight shooting, and preparation from the evening sunset session. Meaning we were ‘working’ 12 hour days.

In addition to what nature provided to us, we were fortunate enough to have access to a local falconer who was well tuned to the needs of a group of photographers. BTW I wonder what the collective noun for a group of photographers is? Maybe a snap of photographers ;-)

The weekend’s success was rounded off by being with a great group of photographers, all, like me, wishing to learn more about their craft and passion.

So what were some of the things I learned? 
  • Sunrise photography of moving targets is hard! In addition to coping with a 500mm lens at F/8, to get ‘most’ of a large bird in focus, you need to shoot at very high ISOs: at least until the sun comes to your rescue. I was lucky in that my 5DIII can be pushed, so I was shooting in the morning at ISOs of 1600-3200 and getting reasonable shots. Shutter speed is critical, ie at least 1/1000 and ideally higher.  
  • Before the workshop I would have been tempted to use Tv mode and auto-ISO; and this would be OK if the scene’s overall brightness remain ‘constant’. However, as the birds fly past you the background shifts from water, to mountains, to mountains & sky, and finally to sky. Using auto ISO would have shifted the exposure of the bird all over the place: resulting in black birds against a perfectly exposed sky. The ‘secret’ is to use a fixed (high) ISO and meter on the bird and set this in M mode. OK you may get some blown out backgrounds, but at least you will see feathers!
  • I was using a Wimberley Sidekick ( http://www.tripodhead.com/products/sidekick-main.cfm ) with my ballhead ( http://www.acratech.net/ballheads/gp/gps ) and I decided rather than mount the lens directly to the sidekick, I would use an L-bracket to create a quasi-full-gimbal head arrangement. I considered this set-up a great success as it allowed me to control the camera’s direction with my right hand whilst laying my left on the lens barrel for stability.
  • I did consider renting a 600mm prime, but stuck with my Sigma 150-500mm, and I’m glad I did. The Sigma is a great ‘BIF beginners’ lens, ie before you decide to shell out the big money! At F/8 I was able to make full use the 5DIII’s fantastic focus tracking system.
  • I also attached my battery grip, as I didn’t want to ‘waste time’ monitoring power. But I did need to keep an eye on my CF cards! In BIFing photography you are usually shooting in burst mode and hence, over the weekend, I shot some 4500 images! You need a lot of cards! 
  • I also decided to use this first ‘BIF training’ session to see if Magic Lantern Dual-ISO would help me. The answer is yes and no. When I was shooting with the falconer, ie in bright sunshine, I was using a base ISO of 100, bumped up by dual to 100/800. Dual worked well here, giving me a 13-14 Ev dynamic range. For the sunrise sessions, where I was shooting at ISO 1600-3200, dual was not much help here, as I found out in post. 
  • Also, for the 5DIII the 1600-3200 zone is where metering strategy changes. Below this zone and certainly at the native ISO of 100, where the camera DR is limited by its electronics, it is best to use ETTR. Above this zone, where the camera is limited by its sensor, there is no point in using ETTR. See http://www.clarkvision.com/articles/iso/index.html for some great insight.

In a future post I intend to write more about my BIF photography developments, especially after I have revisited my local BDA ‘training ground’.

So what about results? Well here are a few images, which I have taken from my first ‘quick and dirty’ post processing session: the day I returned from my wonderful weekend excursion. More can be found here: http://grayheron.smugmug.com/Birds-in-Flight/


Saturday, November 8, 2014

Wide Angle Corrections

Today was all about exploring the extreme end of my new 12-24mm lens, as I know this will be the end that will require the most corrections.

As a Photoshop-CC user I have three main tools to ‘play around’ with when correcting WA lenses. First, simply let the Adaptive Wide Angle filter do all the heavy lifting. Secondly, use the free Transform tool. Thirdly, and the one I like using with WA lenses, is to use the Perspective Warp tool.

As usual with my photography, it’s all about workflow, so here is how I currently use the perspective warp tool.

To give you an idea of what is possible here is the pre-processed 12mm Dual-ISO image, taken on a tripod at F/16. BTW the front of the orchid was about 16in from the sensor plane of my 5DIII.
First, in LR, I put the base corrections in place, which in this case gives me this image.


I then export to PS-CC from LR and create a Perspective Warp frame for the image: in this case it looks like this.


The positioning of the middle, where the two grids join, is dependent on your camera orientation relative to the image. Once the frame is in place I adjust the WA ‘distortion’ as I see fit. In this case I decided to ‘correct’ the lower half like this:


After playing around a little bit more I arrived at the following final boring image!


Bottom line: although one can make an image out of an uncorrected WA shot, with a little bit of LR and Photoshop magic, you can create an image with a reasonable looking feel to it: it’s your artist choice!