As some may have been following in my previous posts, I’ve been trying to write a Lua script to help with both focus and exposure bracketing in my Magic Lantern enhanced Canon. My goal remains to write an automatic script for this, ie one button push: but until the Lua and ML coding gets ‘fixed’, I’ve decided to settle on a manual-based ‘helper script’.
At first, I thought I could achieve more than I have, but even the might of the ML gurus (David Milligan et al) could not ‘educate’ me enough to sort out the ‘complexities’ of semaphore errors :-)
I thus offer the following as a user-driven, ‘workflow helper script’. It is aimed at those that are interested in landscape (sic) focus AND exposure bracketing, ie together.
The script assumes your lens reports position and depth of field and is in Live View. You, obviously, must have the Lua module loaded.
In addition, the user needs to ensure that ML ETTR is switch on (I prefer to trigger from the SET button) and that ML exposure settings preference is set, eg 3 x 2Ev. The script provides the option to switch bracketing from current exposure, ie symmetrically about the current exposure, or, following an ETTR SET exposure, from the ETTR. The script switches to the correct sequence, according to if ETTR is used or not.
In addition the script provides a convenient way to take a ‘bookend’ exposure, ie a dark frame, which is toggled on and off via the RATE button (the user can change the button in the script). This also handles exposure bracketing to allow a single frame capture, even if you are doing exposure bracketing (see below).
The workflow that I use with this script goes like this:
Setup Phase
1. Ensure ML-ETTR enabled (I personally use the SET button). Also select diffraction aware in the ML DoF menu, and switch DoF on;
2. Ensure the number of frames (Auto or a number) and Ev delta is set in the ML-Bracketing menu. Note bracketing doesn’t need to be switched on at this stage;
3. Go the the Landscape Stacking Helper (by default positioned in the Audio ML Menu, but this can be changed in the script);
4. Select the Exposure bracketing strategy you need, ie ‘None’, symmetrically ‘From here’ or ‘From ETTR’ exposure;
5. Select the bracket to bracket focus overlap. This is an additional helper feature that attempts to show you are x% overlapping, but note, according to the lens it doesn’t always show/work;
6. Select if you wish to use image ‘bookends’, which will allow you to quickly take a dark frame or two dark frames to help differentiate between various bracket sets;
7. Finally, in the script menu, turn on the script and do a half shutter press to get rid of the menu or go to LV to remove the script’s menu;
Use Case 1 - Simple Focus Bracketing (without bookends)
1. Switch on Live View, compose, set exposure and focus on the nearest point in your focus stack;
2. Press shutter (eg with your choice of delay etc in the normal Canon menu, or use a remote) and grab the first image;
3. In the top right of the ML top bar you will see a yellow rectangle, indicating the next bracket needs to be moved towards infinity;
4. Rotate the lens (or use ML Follow Focus) to move the lens towards infinity until the yellow box turns Green or Red;
5. If it turns Green this indicates you are in the % overlap region. If it turns red this means you have negative overlap, ie a focus gap, and you should move the lens towards the macro end until it goes green or just yellow. According to the lens, focus point or aperture settings, you may not see green;
6. Press the shutter and grab the next image;
7. Repeat the above until Inf (infinity) is seen in the coloured box (consider taking an insurance image beyond this point if you wish, ie focus point actually at or near infinity;
8. To start another bracket set, simply move the lens to the closest object and take the first image to reset the helper and repeat as above.
Use Case 2 - Simple Focus Bracketing (with bookends)
1. The ‘problem’ with the above (simple) workflow is that if subsequent bracket sets are similar, ie no change in composition, you may have problems in post differentiating the bracket sets (unless you remember how many images in each set. For this reason I have included a simple ‘bookend’ tool;
2. To use the bookend tool, ensure it is switched on, in the helper menu;
3. At the start of the focus bracketing, simple press the RATE button (unless you have changed this in the script). The LV image will go black. Press the shutter, to grab this dark ‘bookend’ image, and then press RATE again, to toggle back to the correct/original exposure;
4. Carry on as in Use Case 2 until the final focus bracket is reached;
5. Press RATE to switch to dark frame mode, grab a final bookend image, and press RATE to reset the exposure. You now have a focus set bookended by dark frames, thus allowing you to easily differentiate this set in post processing.
Use Case 3 - Focus and Exposure Bracketing (with bookends)
1. Ensure bookends are enabled and that the required exposure bracketing strategy has been set up in the ML menu (let’s assume we are going to take three brackets from an initial ETTR exposure);
2. Press SET to set the ETTR base exposure;
3. Focus on the closest focus point;
4. Press RATE and take two (sic) dark frames (as we will need to differentiate an exposure bracket set within a focus bracket set. This become especially important if you decide to use Auto bracketing, where the exposure bracket may change between different focus sets. Also note that if using auto bracketing, you will need to give a half-shutter press to clear the auto bracketing screen feedback - I have put in a feature request to ‘fix this’, ie return the screen after an auto bracketing capture);
5. Press RATE to return to the ETTR base exposure;
6. Press the shutter (or remote) to take the first exposure bracket set at the first focus bracket point;
7. Press RATE, Press the shutter/remote and Press RATE to bookend the first focus set;
8. Move the lens to the next focus point using the colour indicator;
9. Press RATE, Press shutter and Press RATE to bookend the start of the next focus/exposure set;
10. Press the shutter/remote to take the exposure bracket set at the this focus bracket point;
11. Keep doing the above until Infinity reached (consider grabbing an insurance focus/exposure set with the focus point at or near infinity (note the infinity warning is when Depth of Field Far reaches infinity);
12. Finally, press RATE, Press shutter twice (sic) and Press RATE to bookend the entire set. You will now have a set of images on your card with a pattern like this:
Dark
Dark
Focus1/Exposure1
Focus1/Exposure2
Focus1/Exposure3
Dark
Focus2/Exposure1
Focus2/Exposure2
Focus2/Exposure3
Dark
Dark
Finally, the usual caveats: you use the script at your own risk. I have tested it with my 5D3 and a 24-105 F/4L lens; and I welcome feedback regarding making the script better.
For those that wish to explore, here is the script (UPDATED 13-March-16):
--[[
Manual Landscape bracketing helper script
Version 0.3.6
Garry George Feb 2016
http://photography.grayheron.net/
Workflow helper script for focus and exposure bracketing.
Try using ML follow focus to control the lens, as opposed to rotating lens by hand.
Yellow means move more towards the infinity end, Red means move more towards macro end,
Green means at the sweet spot. If Green not seen, move to just being in the Yellow from being in the Red.
************************
* Must be in liveview! *
************************
--]]
a1 = lens.dof_near
b1 = lens.dof_far
c1 = 0
fp = lens.focal_distance
inf = 1000000
started = false
bookended = true
current_tv = camera.shutter.ms
factor = .2
event.keypress = function(key)
if keymenu.submenu["Turn On/Off"].value == "Off" then
started = false
return true
else
if key == KEY.RATE then
if keymenu.submenu["Bookends"].value == "yes"
then
if bookended then
current_tv = camera.shutter.ms
camera.shutter.ms = 1
if keymenu.submenu["Exposure bracketing"].value ~= "None" then i = menu.set("Shoot","Advanced Bracket",0) end
bookended = false
else
camera.shutter.ms = current_tv
if keymenu.submenu["Exposure bracketing"].value ~= "None" then i = menu.set("Shoot","Advanced Bracket",1) end
bookended = true
end
return false
else
return true
end
end
if key == KEY.FULLSHUTTER
then
b1 = lens.dof_far -- in mm
fp = lens.focal_distance -- in cm
c1 = b1 - (b1 - fp*10)*factor
started = true
return true
end
end
end
lv.info
{
name = "Landscape Stacker Info",
value = "",
priority = 100,
update = function(this)
this.value = ""
if fp == 0 then
this.value = ""
else
if keymenu.submenu["Turn On/Off"].value == "On"
then
if started then
a2 = lens.dof_near
this.value = ""
if a2 > b1 then
this.background = COLOR.RED
elseif a2 < c1 then
this.background = COLOR.YELLOW
this.foreground = COLOR.BLACK
else
this.background = COLOR.GREEN1
end
if lens.dof_far >= inf then
this.value = "Inf"
else
this.value = " "
end
end
else
this.value = ""
end
end
end
}
keymenu = menu.new
{
parent = "Audio",
name = "Landscape Stacking Helper",
help = "First focus at nearest point in bracket set",
help2 = "and take first picture",
depends_on = DEPENDS_ON.LIVEVIEW,
submenu =
{
{
name = "Turn On/Off",
help = "Switches the script on/off",
help2 = "Simply enables addition button functionality",
depends_on = DEPENDS_ON.LIVEVIEW,
choices = {"Off","On"},
},
{
name = "Bracket to bracket overlap",
help = "Amount to overlap each bracket",
help2 = "% of FP-2-DoF(far) distance",
choices = {"20","10", "5"},
update = function(this)
factor = tonumber(keymenu.submenu["Bracket to bracket overlap"].value)/100
end,
},
{
name = "Bookends",
help = "Toggles a dark frame exposure",
choices = {"no","yes"},
},
{
name = "Exposure bracketing",
help = "Set options in the ML bracketing menu",
choices = {"None","From here", "From ETTR"},
update = function(this)
if keymenu.submenu["Exposure bracketing"].value == "None" then
i = menu.set("Shoot","Advanced Bracket",0)
else
i = menu.set("Shoot","Advanced Bracket",1)
if keymenu.submenu["Exposure bracketing"].value == "From ETTR" then i = menu.set("Advanced Bracket","Sequence",2) end
if keymenu.submenu["Exposure bracketing"].value == "From here" then i = menu.set("Advanced Bracket","Sequence",1) end
end
end
}
}
}
Friday, February 19, 2016

Monday, February 15, 2016
In-Camera Focus Stacking Helper
I hope this post and script helps others who are learning/struggling to become Magic Lantern 'scripters'.
I couldn't have got this far without the help of David Milligan and others, who have provide feedback. So thank you David.
Although learning Lua scripting is easier than trying to code in ML C, Lua still requires some effort to learn, especially while the 'user manual' is being developed. For instance http://davidmilligan.github.io/ml-lua/index.html helps, but there are still areas where the user is left 'guessing'.
As a scripting newbie, I have spent tens of hours experimenting and trying to divine what my various coding errors mean. I have also educated myself on event driven programming and now have a reasonable looking, and simple, script to offer the Canon Magic Lantern user community.
This script's only purpose is to provide in-camera feedback to aid landscape (sic) focus stacking, ie NOT macro focus stacking.
The caveats are the lens must report focus distance and Depth of Field, and Live View must be on. Also you must have the latest ML nightly that has the Lua module.
Before using the script it is best to check if the ML DoF is set up correctly, eg I recommend switching on the diffraction aware option.
I have positioned the script in the Audio menu (my preference), but you can reposition elsewhere by changing
Here is the script, which you should put in a text file with a .lua extension and place this file in the ML script folder.
The script, by default, is not running. To switch it on, go to the ML Audio menu and switch to 'on'.
Also change the bracket to bracket overlap %. The default is 20%, but you can reduce this to 10% or 5%. The % represent the % of the distance between the current bracket's DoF(far) and the focal_distance. According to the lens you may not see the effect of this variable.
Do a half shutter press to get rid of the script's menu and, of course, ensure you are displaying the ML top and bottom bars of information, ie if not seen press INFO a few times (in LV).
To use the script, once switched on, position the lens at the first (closest) bracket and take the first picture. You will then see a helper flag (coloured block) come on.
The coloured block has the following meaning:
* Yellow = move the lens towards the infinity end
* Red = move the lens towards the macro end
* Green, if seen, means the lens is in the 'sweet spot', according to the % overlap criterion
If you don't see green, but just yellow or red, simply move the lens into the yellow position just before it goes red.
Consider using the ML follow focus to move the lens, as this is more controllable than trying to manually position the lens.
Each time you take a picture move the lens closer to the infinity end until you see INF in the coloured block. This means the DoF-far has reached infinity: you may wish to take an insurance shot beyond this.
To take a new set of brackets, simply reposition the lens to a new closest image and take a picture to reset the bracketing sequence. Consider grabbing a bookend image to separate your bracket sequences, eg an image of your hand: this will help in post processing, especially if you are not recomposing.
Bottom line: I have tested the script on my 5D3 and 24-105 F/4L and it works for me. I hope it does for you - remember the lens must report DoF and position. As usual I welcome feedback on this script. Also note that my next project is an automated version of this, but I can't finish this until the next Lua update is pushed out, eg fixing the lens control by Lua.
I couldn't have got this far without the help of David Milligan and others, who have provide feedback. So thank you David.
Although learning Lua scripting is easier than trying to code in ML C, Lua still requires some effort to learn, especially while the 'user manual' is being developed. For instance http://davidmilligan.github.io/ml-lua/index.html helps, but there are still areas where the user is left 'guessing'.
As a scripting newbie, I have spent tens of hours experimenting and trying to divine what my various coding errors mean. I have also educated myself on event driven programming and now have a reasonable looking, and simple, script to offer the Canon Magic Lantern user community.
This script's only purpose is to provide in-camera feedback to aid landscape (sic) focus stacking, ie NOT macro focus stacking.
The caveats are the lens must report focus distance and Depth of Field, and Live View must be on. Also you must have the latest ML nightly that has the Lua module.
Before using the script it is best to check if the ML DoF is set up correctly, eg I recommend switching on the diffraction aware option.
I have positioned the script in the Audio menu (my preference), but you can reposition elsewhere by changing
parent = "Audio"Here is the script, which you should put in a text file with a .lua extension and place this file in the ML script folder.
--[[
 Manual Landscape bracketing helper script
 Version 0.3.3
 Garry George Feb 2016
 http://photography.grayheron.net/
 First focus at nearest bracket in focus stack then move towards infinity.
 Try using ML follow focus to control lens, as opposed to rotating lens by hand.
 Yellow means move more towards the infinity end, Red means move more towards macro end,
 Green means at the sweet spot. If Green not seen, move to just being in the Yellow from being in the Red.
 ************************
 * Must be in liveview! *
 ************************
--]]
a1 = lens.dof_near
b1 = lens.dof_far
c1 = 0
fp = lens.focal_distance
inf = 1000000
started = false

event.keypress = function(key)
 if keymenu.submenu["Turn On/Off"].value == "Off" then started = false end
 if fp ~= 0 then
 if key == KEY.UNPRESS_FULLSHUTTER
  then
  b1 = lens.dof_far -- in mm
  fp = lens.focal_distance -- in cm
  if keymenu.submenu["Bracket to bracket overlap"].value == "20%" then
  factor = .2
  elseif keymenu.submenu["Bracket to bracket overlap"].value == "10%" then
  factor = .1
  else
  factor = .05
  end
  c1 = b1 - (b1 - fp*10)*factor
  started = true
 end
 end
end

lv.info
{
    name = "Landscape Stacker Info",
    value = "",
    priority = 100,
    update = function(this)
    this.value = ""
 if fp == 0 then
 this.value = ""
 else
    if keymenu.submenu["Turn On/Off"].value == "On"
    then
    if started then
   a2 = lens.dof_near
   this.value = ""
   if a2 > b1 then
   this.background = COLOR.RED
   elseif a2 < c1 then
   this.background = COLOR.YELLOW
   this.foreground = COLOR.BLACK
   else
   this.background = COLOR.GREEN1
   end
   if lens.dof_far >= inf then
   this.value = "Inf"
   else
   this.value = "   "
   end
 end
 else
 this.value = ""
 end
 end
 end
}

keymenu = menu.new
{
 parent = "Audio",
 name = "Landscape Stacking Helper",
 help = "First focus at nearest point in bracket set",
 help2 = "and take first picture",
 depends_on = DEPENDS_ON.LIVEVIEW,
 submenu =
 {
  {
   name = "Turn On/Off",
   help = "Switches the script on/off",
   depends_on = DEPENDS_ON.LIVEVIEW,
   choices = {"Off","On"},
  },
  {
   name = "Bracket to bracket overlap",
   help = "Amount to overlap each bracket",
   help2 = "% of FP-2-DoF(far) distance",
   choices = {"20%","10%", "5%"},
  }
 }
}
The script, by default, is not running. To switch it on, go to the ML Audio menu and switch to 'on'.
Also change the bracket to bracket overlap %. The default is 20%, but you can reduce this to 10% or 5%. The % represent the % of the distance between the current bracket's DoF(far) and the focal_distance. According to the lens you may not see the effect of this variable.
Do a half shutter press to get rid of the script's menu and, of course, ensure you are displaying the ML top and bottom bars of information, ie if not seen press INFO a few times (in LV).
To use the script, once switched on, position the lens at the first (closest) bracket and take the first picture. You will then see a helper flag (coloured block) come on.
The coloured block has the following meaning:
* Yellow = move the lens towards the infinity end
* Red = move the lens towards the macro end
* Green, if seen, means the lens is in the 'sweet spot', according to the % overlap criterion
If you don't see green, but just yellow or red, simply move the lens into the yellow position just before it goes red.
Consider using the ML follow focus to move the lens, as this is more controllable than trying to manually position the lens.
Each time you take a picture move the lens closer to the infinity end until you see INF in the coloured block. This means the DoF-far has reached infinity: you may wish to take an insurance shot beyond this.
To take a new set of brackets, simply reposition the lens to a new closest image and take a picture to reset the bracketing sequence. Consider grabbing a bookend image to separate your bracket sequences, eg an image of your hand: this will help in post processing, especially if you are not recomposing.
Bottom line: I have tested the script on my 5D3 and 24-105 F/4L and it works for me. I hope it does for you - remember the lens must report DoF and position. As usual I welcome feedback on this script. Also note that my next project is an automated version of this, but I can't finish this until the next Lua update is pushed out, eg fixing the lens control by Lua.
Saturday, January 30, 2016
Magical auto landscape bracketing
***** Note, as of this update (20th Feb 2016) this post has been superseded by the following posts, as some of the 'backend' ML code needed for an auto script still needs to be fixed. So the script should not be used for now *****
In previous posts I have spoken about the power of Magic Lantern to take a Canon EOS system to 'another level'. For example, using the diffraction corrected Depth of Field feedback, one can manually construct a set of focus brackets when taking landscapes, eg not doing simple (linear) macro bracketing.
Without ML, you will need to calculate the appropriate focus points, eg using http://goo.gl/J6F4Z5, and then trying to estimate the required focus points on your lens: not an easy task.
Now there is a third way: a Magic Lantern script that I have written (and will develop further).
The script is written in Lua and runs from the Magic Lantern menu: I have positioned it in the Audio Menu in ML, as this is uncluttered by other menu items. But a simple change in the script will allow you to position it elsewhere in ML.
To use the script make sure you have the latest ML nightly, as you must have the Lua interpreter running. This version of the script has been written to automatically gather brackets down, from the furthest focus point, towards the macro end of the lens. So you need to ensure you are focused at this position. For example, at infinity or anywhere between infinity and the hyperfocal distance.
The script will only work if your lens has autofocus enabled and reports focus distance. A good check is to enable Depth of Field reporting in ML, and see if it reports in LV. If you see the focus distance being reported, as well as the near and far depths of field, the script should run as programmed. This version has some crude error checking.
The Landscape Focus Stacker (LFS) menu has several user inputs/choices. First, you can choose the delay time, so the camera settles down. The default is 5 seconds.
You also need to tell the script what the Minimum Focus Distance of your lens is. This is easy to ascertain, by looking at the focus distance LV reporting as you position the focus to the macro end. The MFD is in cm. The MFD can vary significantly from lens to lens, so be wary of using a single MFD.
Finally, you can ask the script to bookend your bracket sequence, by inserting a dark frame at the beginning and end of the sequence. This is a help when you are ingesting lots of different focus brackets in to, say, Lightroom.
I have appended the script at the end of this post: note this is an early version and I will be updating it with other functionality, eg bracketing from the macro end to infinity. Simply copy the script into a flat/text document and ensure the file extension is .lua. Place the file in the ML script folder on your camera's card.
To use the script simply follow this suggested workflow:
- Select composition and exposure as normal;
- Select the correct DoF settings in the ML menu, eg diffraction on and the Circle of Confusion criterion for your needs;
- Ensure AF is on and switch to LV;
- Set the required user choices in the LFS menu, eg delay, MFD and whether to bookend or not;
- Set focus for the farthest bracket;
- Select Run in the LFS menu and press SET;
- Sit back and watch the script capture the perfect set of landscape brackets.
The following is a test image I ran for this post. I shot this at F/8, with a MFD of 50cm. Once I had focused at the furthest point, the script ran and decided I required four brackets. The resultant (boring, indoor) image is in focus throughout; whereas each image, at F/8, only exhibited focus in part of the image.

The addition of Lua scripting in ML is one of the most significant recent additions to Magic Lantern; and I wish to publicly thank David Milligan and other ML heros who have made the Lua scripting environment a reality.
Finally, here is the LFS script...enjoy!
-- Simple landscape bracketing script
-- Version 0.2
-- Assumes lens is positioned at farthest point
-- in bracket set.
a1 = 0
b1 = 0
a2 = 0
b2 = 0
i = 0
current_tv = 0
current_av = 0
function main()
-- Close ML menu
menu.close()
if lens.dof_near ~= 0 and lens.af == true
then
-- Delay for requested seconds
for i = keymenu.submenu["Delay"].value,0,-1
do
msleep(1000)
end
-- Check if bookends requested
if keymenu.submenu["Bookends"].value == "yes"
then
current_tv = camera.shutter.apex
current_av = camera.aperture.apex
camera.shutter.apex = 100
camera.aperture.apex = 90
task.yield(100)
camera.shoot(64, 0)
camera.shutter.apex = current_tv
camera.aperture.apex = current_av
end
-- Capture first image
a2 = lens.dof_near
b2 = lens.dof_far
task.yield(100)
camera.shoot(64, 0)
-- take remaining brackets to macro end
repeat
a1=a2
b1=b2
repeat
lens.focus(1,1)
b2 = lens.dof_far
a2 = lens.dof_near
until b2 < a1 or lens.focal_distance <= keymenu.submenu["MFD"].value
camera.shoot(64,0)
until lens.focal_distance <= keymenu.submenu["MFD"].value
-- User macro stop reached
beep(4, 100, 330)
-- Check if bookends requested
if keymenu.submenu["Bookends"].value == "yes"
then
current_tv = camera.shutter.apex
current_av = camera.aperture.apex
camera.shutter.apex = 100
camera.aperture.apex = 90
task.yield(100)
camera.shoot(64, 0)
beep(4, 100, 630)
camera.shutter.apex = current_tv
camera.aperture.apex = current_av
end
end
end
keymenu = menu.new
{
parent = "Audio",
name = "Landscape Stacker",
help = "Focus at farthest point",
help2 = "AF must be on",
depends_on = DEPENDS_ON.LIVEVIEW,
submenu =
{
{
name = "Run",
help = "Starts the script",
depends_on = DEPENDS_ON.LIVEVIEW,
select = function(this) task.create(main) end,
},
{
name = "Delay",
help = "Seconds to delay start (default 5)",
value = 5,
min = 0,
max = 10
},
{
name = "MFD",
help = "Min Focus Distance (default 50cm)",
help2 = "Set for your lens",
value = 50,
min = 10,
max = 500
},
{
name = "Bookends",
help = "Adds a dark frame before/after brackets",
choices = {"no","yes"},
value = {"no"}
}
}
}
Sunday, December 20, 2015
Pre-Christmas Presents!
As some readers are aware, my life has been rather complex over the last six months and there has been little time for photography.
However, with the Christmas break now starting, I have managed to find some time to explore three ‘toys’: I mean early Christmas presents.
First, further additions to the growing family of Photoshop Luminosity Masking (LM) tools; second a fantastic new App for Sony shooters; and thirdly an excellent training video, that I’m looking forward to watching over the holidays.
As many know, I currently use two LM toolsets, that I find to be complementary: TKActions and Lumenzia. I also have Raya Pro, although I tend to favour TKActions and Lumenzia. I have now added a fourth LM tool to Photoshop, that I really like, namely ADPpanel+ from Arron Dowling at http://goo.gl/cf5ZTm
I hope to write more about ADPpanel+ in future posts, but for now I’ll simply recommend you review it. At less than $25, it’s worth a punt!
The Sony (in-camera) App I wish to mention, that I just purchased for less than $10, is Sky HDR: https://goo.gl/U2SYYq
Simply put, if you use graduated ND filters to hold back the sky in landscape photography, then this App is for you: and, of course, if you have a Sony camera that can play Sony’s Apps!
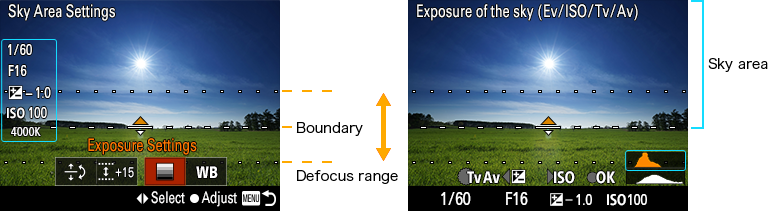
The App allows you to position the variable ND transition, vertically and in rotation; allowing you to set the exposure for the foreground and the sky, and adjust the feather of the transition, from hard to soft.
Being able to do this is impressive, but the App has two killer features. The first allows you to adjust the position of the ND after it has captured two images, one for the foreground and one for the sky. The second is that the App processes the two images in camera and saves the resultant image as a RAW: yes a RAW.
Unfortunately this evening’s weather was pretty bad, but I managed the following test image in my garden with my Sony A6000. With a close-in tree element, the composition isn't ideal for a graduated ND, as the graduated effect cuts through the near field tree: but this was only a quick test.
This is the single RAW capture, no highlights were blown out, using the Sky HDR in-camera App. I processed it in LR and applied a little Orton effect in PS.

My third early Christmas present was a video training course, which I’ll review after I’ve watched it. Unlike my usual video purchases, at a round $30-50, this one was $250.
Bottom line: now that I’ve started my Christmas break, and I’m off work for two weeks, I hope to be able to ‘play around’ with some photography, in between eating turkey and drinking some good beers!
Merry Christmas!
However, with the Christmas break now starting, I have managed to find some time to explore three ‘toys’: I mean early Christmas presents.
First, further additions to the growing family of Photoshop Luminosity Masking (LM) tools; second a fantastic new App for Sony shooters; and thirdly an excellent training video, that I’m looking forward to watching over the holidays.
As many know, I currently use two LM toolsets, that I find to be complementary: TKActions and Lumenzia. I also have Raya Pro, although I tend to favour TKActions and Lumenzia. I have now added a fourth LM tool to Photoshop, that I really like, namely ADPpanel+ from Arron Dowling at http://goo.gl/cf5ZTm
I hope to write more about ADPpanel+ in future posts, but for now I’ll simply recommend you review it. At less than $25, it’s worth a punt!
The Sony (in-camera) App I wish to mention, that I just purchased for less than $10, is Sky HDR: https://goo.gl/U2SYYq
Simply put, if you use graduated ND filters to hold back the sky in landscape photography, then this App is for you: and, of course, if you have a Sony camera that can play Sony’s Apps!
The App allows you to position the variable ND transition, vertically and in rotation; allowing you to set the exposure for the foreground and the sky, and adjust the feather of the transition, from hard to soft.
Being able to do this is impressive, but the App has two killer features. The first allows you to adjust the position of the ND after it has captured two images, one for the foreground and one for the sky. The second is that the App processes the two images in camera and saves the resultant image as a RAW: yes a RAW.
Unfortunately this evening’s weather was pretty bad, but I managed the following test image in my garden with my Sony A6000. With a close-in tree element, the composition isn't ideal for a graduated ND, as the graduated effect cuts through the near field tree: but this was only a quick test.
This is the single RAW capture, no highlights were blown out, using the Sky HDR in-camera App. I processed it in LR and applied a little Orton effect in PS.

My third early Christmas present was a video training course, which I’ll review after I’ve watched it. Unlike my usual video purchases, at a round $30-50, this one was $250.
Bottom line: now that I’ve started my Christmas break, and I’m off work for two weeks, I hope to be able to ‘play around’ with some photography, in between eating turkey and drinking some good beers!
Merry Christmas!
Tuesday, December 1, 2015
Further explorations with IR
In previous posts I have talked about infra red photography, which for me means my EOS 50D converted camera. In this post I thought I would talk a little about the post processing.
The starting image is the usual horrible looking RAW capture; and if you looked at this image, you would think that there is no hope.


The first step is to get rid of the colour cast, using a DNG profile I created for use in Lightroom: giving this as my new starting image for post processing.

Following the colour cast correction, I made a round trip to Photoshop-CC and used a couple of tools:


The starting image is the usual horrible looking RAW capture; and if you looked at this image, you would think that there is no hope.


The first step is to get rid of the colour cast, using a DNG profile I created for use in Lightroom: giving this as my new starting image for post processing.

Following the colour cast correction, I made a round trip to Photoshop-CC and used a couple of tools:
- SilverEfex Pro II to do the base conversion to B&W;
- Use of both TKAction and Lumenzia luminosity masking tools to bring out some localised tonal quality;
- Use of Flaming Pear Flood to accentuate the reflections in the creek;
- Finally returning to LR for some tweaks.


Simulating Composition and Lighting in Landscape Photography
In previous post I have talked about various Apps that help you simulate or plan for a photography expedition. To day, thanks to a YouTube video by Yuri Fineart, I came across another technique: https://youtu.be/hTg6yo5venU
All you need is to download the free Google Earth App: following which you can get a feel for any location where you are thinking of trekking.
The one ‘disadvantage’ is that you don’t seem to be able to visualise the Moon’s transit across the sky, like you can with the Sun. However, for sunrise, sunset and astro-photography, it's great.
Rather than attempting to explain the tool, simply watch Yuri's video.
All you need is to download the free Google Earth App: following which you can get a feel for any location where you are thinking of trekking.
The one ‘disadvantage’ is that you don’t seem to be able to visualise the Moon’s transit across the sky, like you can with the Sun. However, for sunrise, sunset and astro-photography, it's great.
Rather than attempting to explain the tool, simply watch Yuri's video.
Wednesday, November 25, 2015
Enhanced post-processing control
Having experimented with other luminosity masks toolsets, such as Raya-Pro (http://www.shutterevolve.com), I believe I have now found the ‘ultimate’ luminosity masking set up, which is: TKAction and Lumenzia - together!
Lumenzia creates masks in a different way to TKActions, not through channels but through taylored use of curves. Lumenzia is available from: https://gregbenzphotography.com/lumenzia/
At $70 for the pair, these two Photoshop add-ons represent real post-processing value.
As to how and when I use them? Simply every time I use Photoshop.
Thus, after a few Lightroom corrections my workflow is a round trip to Photoshop and, using both TKActions and Lumenzia, which work seamlessly together, I exploit the tailored adjustments that the self-feathering luminosity mask-based approach allows.
As a simply example of the control that an LM-based workflow brings, the following single image, Sony A6000 capture was given the LM touch., which allowed me to target the trees and bring drama into the sky. Note that the sky was there in the original capture, it 'just' needed developing in post.


Bottom line: if nothing else watch the video tutorials on TKActions and Lumenzia. But I’m sure you will decide that $70 is a real bargain.
Subscribe to:
Posts (Atom)