Most of my posts are about achieving the best exposure or focus that you can: so I decided a while ago to 'try something different'.
Pinhole photography!
The other day my new lens arrived: a pinhole lens from thingyfy
Unlike other pinhole lens, or one you make yourself, the Thingyfy lens has variable apertures. From 0.1 to 0.8mm.
The lens has a focal length of 50mm, which can be changed by using extension tubes.
The ability to dial-an-aperture is the real selling point for me, as the Prober-Wellman equation in the visible bands shows the optimum pinhole size varies with focal length and M, the magnification, which is simply the focal length divided by the subject distance from the aperture:
Others have plotted the above for various focal lengths and magnifications:
For landscape work, where M approaches 0, for a 50mm focal length the optimum pinhole diameter is about 0.25mm.
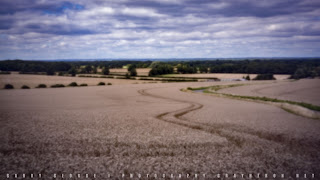
So what does an image look like with my new lens?
Here are a few test images taken this afternoon. Both typical scenes around us at the moment: crops and cricket (note I shot when the bowler was running).
Both images benefited from being ETTRed via Magic Lantern, of course; and were post processed in Lightroom and Photoshop. At ISO100 the ETTR exposure was 5s on one and 3.2s on the other.
One of the downsides of pinhole photography is that you are shooting at very high f/stops, ie in the above images at F/200. At such F/stops you will see every dust particle and therefore you will need to carry out a bit of post processing. I'll be writing about post processing in another post.
Obviously pinhole photography is a statement: it creates ethereal images that are the antitheses of every thing I tried to do in photography, up until now. I'm looking forward to exploring the new lens, including IR pinhole photography.


No comments:
Post a Comment