With a ‘normal’ lens, controlling the focus areas is rather limited to slices of focus orthogonal to the lens’s axis. It is possible to create defocus areas in Photoshop, but, sometimes, this can get out of control, ie creating non-contiguous focus zones that ‘give away’ someone has tinkered with the image in PS.
Another approach is to use a Tilt-Shift Lens. I personally have a TS-E 24mm f/3.5 L II, an incredibly sharp lens, helped by the fact it has large glass to handle the shift capability.
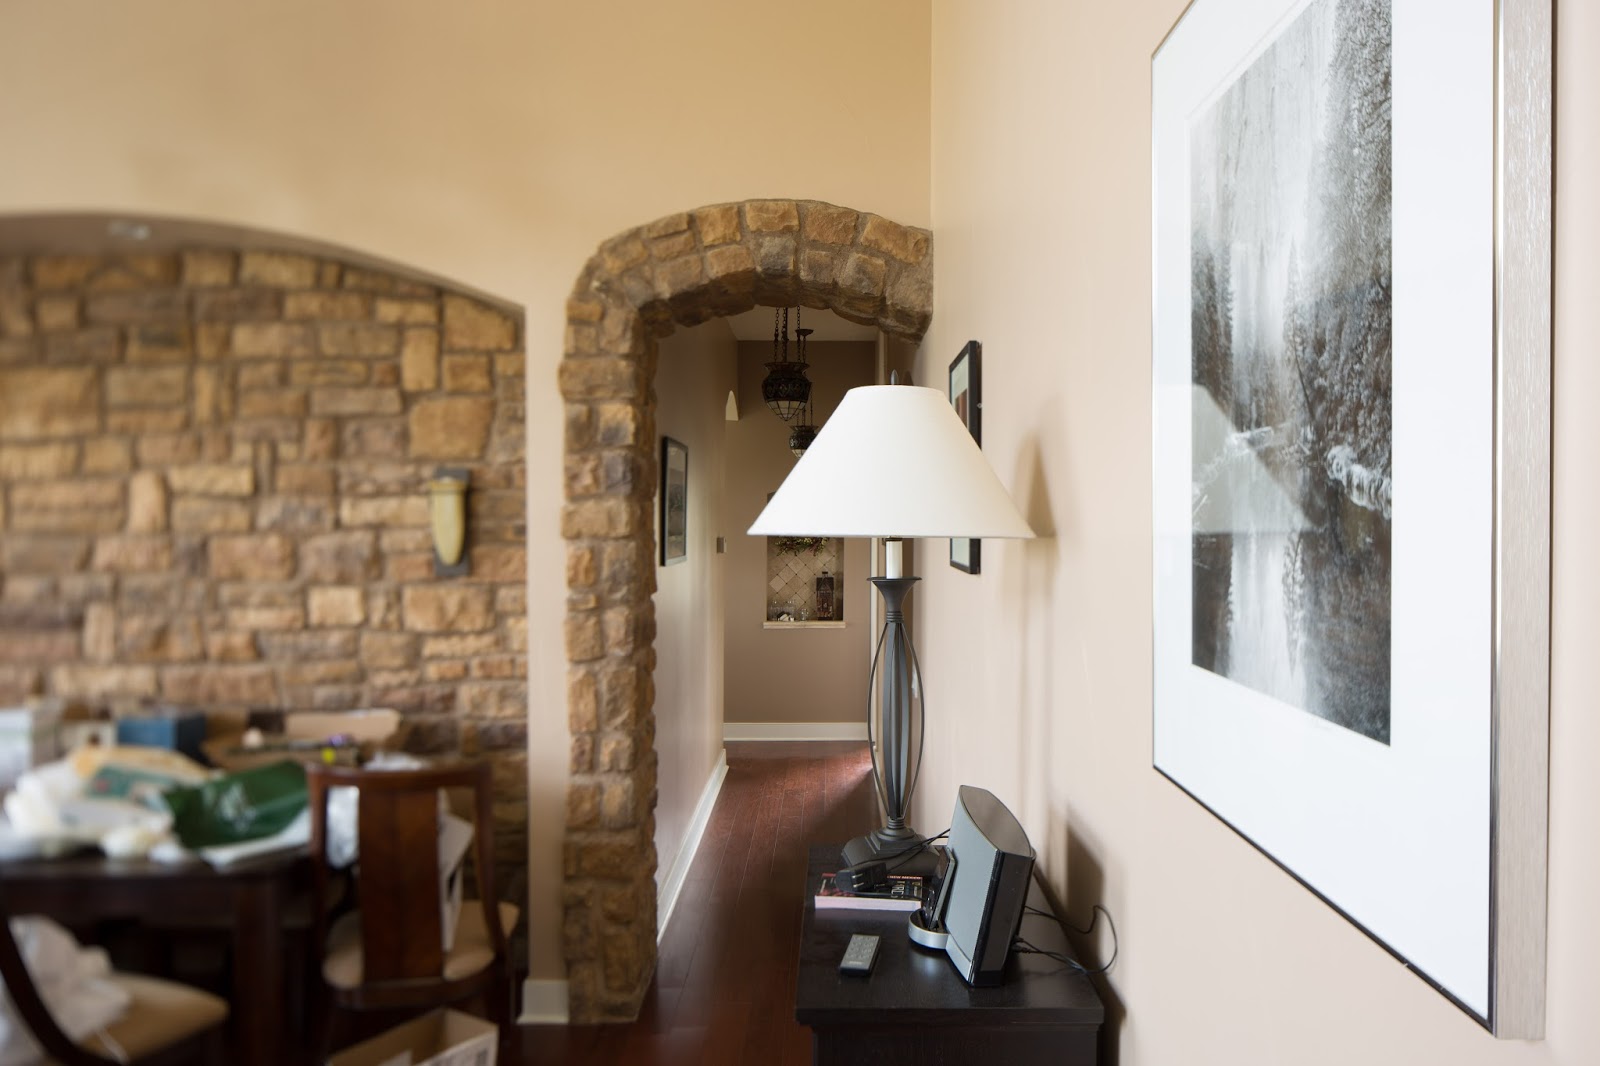
To illustrate what can be accomplished with this lens and only using Lightroom, I decided to capture a boring image in our home, that joined up two main elements in the scene: a large framed black and white print and some Tiffany-like ceiling lamps. To further show the power of Lightroom, I only used natural light to capture the scene, ie although I wanted to light the lamps, I decided to do this in Lightroom.
I placed my 5DIII, with the 24mm TS-E, at about 18in from the edge of the picture frame and selected an aperture of F/4.5, for a controlled focus ‘wedge’. At this aperture the hyperfocal distance is about 15 ft, thus giving an in focus zone (without shifting) from about 7.5 ft to infinity.
Thus if I wanted the lamps and the front of the picture frame in focus, I would have conventionally had to do some focus stacking, ie taking additional images at about 5.5ft, 3.25ft, 2.4ft and 1.75ft, ie to ensure the front edge of the picture and the Tiffany-like lamps were both in focus.
Of course focus stacking would have resulted in an image that was in focus everywhere, which was not what I wanted. In addition, because I wanted to see detail in the lamps I would have to have additionally carried out some exposure bracketing as well. Thus resulting, assuming three brackets, in 15 images, ie 3 and each of the 5 focus stations.
Everything changes with a Tilt-Shift lens.
So I composed the image and rotated by tilt plane to be vertical. As for tilt I started by using the 4.5 rule of thumb. That is the tilt is given simply by 9/(2d), where d is the distance in ft from the untilted sensor-lens centre to to the imaginary hinge point, around which the focus plane rotates.
In this case I estimated I wanted the hinge point at just under a foot, so to bring the picture and lamp into the tilted focus plane.
Having initially selected just under 5 degrees of tilt, into the plane (going the other way would have produced one of those miniature effects), I then used a simple iterative Live View process to rotate the focus plane into the correct position. The process being to focus for the foreground and bend (ie tilt) for the background. This resulted in a final tilt of just under 6 degrees.
As an aside I sometimes use the ML focus peaking in LV, but find this best suited for bringing a flat surface into focus, such as a floor.
For exposure I used Magic Lantern’s spot meter and positioned it on the Tiffney-like lamp at about -2.5Ev from the highlight clipping point. This resulted in a base (ISO 100) exposure of 1s. I them simply used ML’s auto bracketing to capture the required bracket set, ie at 1s, 1/4s and 1/15s. As mentioned in the last post, by starting at the slowest shutter speed, ML’s auto bracketing perfectly handles the remaining bracket set.
Here are the three ML generated brackets.


No comments:
Post a Comment